
How to...
Login Screen
Glue42 Enterprise allows showing a login screen before the first app is loaded. This is useful if you have shared authentication between your apps (SSO) and you want the user to log in just once.
To enable using a login screen, you have to modify the system configuration of Glue42 Enterprise and create a configuration file for your SSO app. To complete the authentication process and allow the user access, you have to signal Glue42 that the user has logged in successfully.
Configuration
The SSO app is a special system app that is loaded on startup of Glue42 Enterprise and allows the user to authenticate. If authentication is successful, then all other app configurations are fetched and loaded based on user permissions.
There are two ways you can define your SSO app:
By defining a standalone SSO app configuration file, adding it to a System App Store of Glue42 Enterprise and enabling SSO authentication from the
system.jsonfile of Glue42 Enterprise (see Standalone SSO App Definition). This is the recommended approach, as it allows you more freedom in configuring your SSO app.By defining your SSO app directly in the
system.jsonfile of Glue42 Enterprise (see SSO Via System Configuration). Not recommended, as this way you can control only a very limited number of properties for the SSO app.
Note that no matter how you choose to define your SSO app, it will have cookies manipulation and access to OS info enabled by default, even if you don't set these properties in its configuration file. This is because SSO apps usually need such permissions in order to complete the authentication process.
Standalone SSO App Definition
If you decide to use a standalone configuration file for your SSO app, follow these steps:
- Enable the login screen using the
"ssoAuth"top-level key of thesystem.jsonfile of Glue42 Enterprise located in%LocalAppData%\Tick42\GlueDesktop\configand set its"authController"property to"sso":
{
    "ssoAuth": {
        "authController": "sso"
    }
}
See also the authentication controller schema.
- Create a configuration file for your SSO app.
Note that it is mandatory to use "sso-application" as a name for your app in the definition. Otherwise, Glue42 Enterprise won't recognize your SSO app and will load the built-in login screen.
The following is an example configuration for an SSO app:
{
    "name":"sso-application",
    "title":"My SSO App",
    "icon": "https://example.com/icon.ico",
    "type": "window",
    "details":{
        "url":"https://example.com",
        "mode": "html",
        "width": 400,
        "height": 400,
        "startLocation": "center"
    }
}- Add your SSO app configuration to a System App Store of Glue42 Enterprise. A System App Store contains system app configurations that are loaded before all other app definitions. Use the
"systemAppStores"top-level key of thesystem.jsonfile to define a System App Store and provide the location of your SSO app configuration. The System App Store can be any App Store type supported by Glue42 Enterprise - local, remote or from a Glue42 Server.
The following is an example configuration for a System App Store pointing to the location of the configuration files for the system apps:
{
    "systemAppStores": [
        {
            "type": "path",
            "details": {
                "path": "./config/system-apps"
            }
        }
    ]
}
SSO Via System Configuration
Note that this approach isn't recommended, because you can define only a very limited number of properties for your SSO app.
Enable the login screen using the "ssoAuth" top-level key of the system.json file of Glue42 Enterprise located in %LocalAppData%\Tick42\GlueDesktop\config and set its "authController" property to "sso". Use the "options" property to provide the location of the login screen and settings for the Glue42 Window in which it will be loaded:
{
    "ssoAuth": {
        "authController": "sso",
        "options": {
            "url": "http://localhost:3000/",
            "window": {
                "width": 500,
                "height": 730,
                "mode": "flat"
            }
        }
    }
}
The "options" object has the following properties:
| Property | Type | Description |
|---|---|---|
"url" |
string |
Location of the login screen. If not provided, will default to the location of the built-in login screen of Glue42 Enterprise. |
"window" |
object |
Settings for the Glue42 Window in which the login screen will be loaded. |
"keepAlive" |
boolean |
If true, Glue42 Enterprise won't close the login window. This way, you can hide it yourself and use it to refresh the authentication parameters (user, token and headers) when necessary. |
The "window" object has the following properties:
| Property | Type | Description |
|---|---|---|
"width" |
integer |
Width of the login window. |
"height" |
integer |
Height of the login window. |
"mode" |
string |
Glue42 Window mode. Possible values are "html" (default), "flat" and "tab". |
See also the authentication controller schema.
Authentication
To allow the user access after authenticating, you must signal Glue42 Enterprise that the authentication process is complete. Use the authDone() method of the glue42gd object which is injected in the global window object. It accepts an optional object as a parameter in which you can specify the name of the authenticated user, а token and headers:
const options = {
    user: "john.doe@org.com",
    token: "token",
    headers: {
        "name": "value"
    }
};

glue42gd.authDone(options);
The optional object passed as an argument to authDone() has the following properties:
| Property | Type | Description |
|---|---|---|
user |
string |
The user ID will be set as a value of the sid property of glue42gd. Can be used for visualization purposes. |
token |
string |
The token will be applied to each request to the remote stores or the Glue42 Server. |
headers |
JSON object |
Extra headers that will be passed to the remote stores or the Glue42 Server. |
Available since Glue42 Enterprise 3.22
The authentication information passed to the authDone() method can be later retrieved by other apps in order to enhance the SSO flow when authentication is needed for additional services. To allow apps to retrieve authentication information, use the "allowAuthInfo" property of the "details" top-level key of the app configuration:
{
    "details": {
        "allowAuthInfo": true
    }
}
To retrieve the authentication information at runtime, use the getAuth() method of the glue42gd object:
const authInfo = await glue42gd.getAuth();Remote Apps & Layouts
In the standard Glue42 Enterprise deployment model, app definitions aren't stored locally on the user machine, but are served remotely. Remote apps and Layouts can be hosted and retrieved using Glue42 Server stores and/or REST stores.
The settings for the app and Layout stores are defined in the system.json file of Glue42 Enterprise located in %LocalAppData%\Tick42\GlueDesktop\config. The app store settings are under the "appStores" top-level key, the Layout store settings are under the "layouts" top-level key.
Note that Glue42 Enterprise respects the FDC3 standards and can retrieve standard Glue42, as well as FDC3-compliant app definitions. For more details on working with FDC3-compliant apps, see the FDC3 Compliance section, the FDC3 App Directory documentation and the FDC3 Application schema.
Glue42 Server
Apps
To configure Glue42 Enterprise to fetch app configurations from a Glue42 Server, set the "type" property of the app store configuration object to "server":
{
    "appStores": [
        {
            "type": "server"
        }
    ]
}
For more details, see App Stores > Glue42 Server Stores.
Layouts
To configure Glue42 Enterprise to fetch Layouts from a Glue42 Server, set the "type" property of the "store" object to "server":
{
    "layouts" : {
        "store": {
            "type": "server"
        }
    }
}
For more details, see Layout Stores.
REST Stores
Apps
To configure a connection to the REST service providing the app store, add a new entry to the "appStores" top-level key of the system.json file:
{
    "appStores": [
        {
            "type": "rest",
            "details": {
                "url": "http://localhost:3000/appd/v1/apps/search",
                "auth": "no-auth",
                "pollInterval": 30000,
                "enablePersistentCache": true,
                "cacheFolder": "%LocalAppData%/Tick42/UserData/%GLUE-ENV%-%GLUE-REGION%/gcsCache/"
            }
        }
    ]
}
The remote store must return app definitions in the following response shape:
{
    "applications": [
        // List of app definition objects.
        {}, {}
    ]
}
For more details, see App Stores > Remote.
Layouts
To configure a connection to the REST service providing the Layout store, edit the "layouts" top-level key of the system.json file:
{
    "layouts": {
        "store": {
            "type": "rest",
            "restURL": "http://localhost:8004/",
            "restFetchInterval": 20,
            "restClientAuth": "no-auth"
        }
    }
}
The remote store must return Layout definitions in the following response shape:
{
    "layouts": [
        // List of Layout definition objects.
        {}, {}
    ]
}
For more details, see Layout Stores.
Example Store Implementations
Apps
For a reference implementation of a remote app configurations store, see the Node.js REST Config example that implements the FDC3 App Directory and is compatible with Glue42 Enterprise. This basic implementation doesn't take the user into account and returns the same set of data for all requests. For instructions on running the sample server on your machine, see the README file in the repository.
For a .NET implementation of a remote app configurations store, see the .NET REST Config example.
Layouts
For a reference implementation of a remote Layout definitions store, see the Node.js REST Config example. The user Layouts are stored in files with the same structure as local Layout files. This basic implementation doesn't take the user into account and returns the same set of data for all users. New Layouts are stored in files using the name of the Layout and there isn't validation for the name. The operation for removing a Layout isn't implemented and just logs to the console. For instructions on running the sample server on your machine, see the README file in the repository.
For a .NET implementation of a remote Layout definitions store, see the .NET REST Config example.
Environments & Regions
Glue42 Enterprise allows running it in different environments and regions. Environments usually include development, testing, quality assurance, production environments, etc., in which Glue42 Enterprise is tested or integrated. Regions can be any semantic groups - geographic regions, user groups, product categories, etc., defined by the client adopting Glue42 Enterprise.
To enable Glue42 Enterprise to run in different environments/regions, you must:
create a separate system configuration file for each environment/region combination. You can use the
system.jsonfile of Glue42 Enterprise located in%LocalAppData%\Tick42\GlueDesktop\configas a base system configuration template, common for all environments/regions;create different shortcuts pointing to the Glue42 Enterprise executable file for each environment/region, and set command line arguments specifying the respective environment/region configuration file that will be merged with the base system configuration file;
System Configuration Files
To set different environments/regions in which to run Glue42 Enterprise, use the system.json configuration file of Glue42 Enterprise as a common configuration. Create separate system configuration files for all environments/regions and in each one define only the settings specific for the environment/region. When you start Glue42 Enterprise in a certain environment/region, the respective configuration file will be merged with the base system.json file, overriding the settings in it.
See also the system configuration and the Glue42 Gateway configuration schemas.
It is important to either specify a different port for the Glue42 Gateway for each environment/region, or to use a Dynamic Gateway Port by setting the Glue42 Gateway port to 0 in the base system configuration file. Otherwise, you won't be able to run multiple instances of Glue42 Enterprise simultaneously in different environments/regions, as the first started instance will occupy the specified port and the other instances won't be able to connect.
Use the "gw" top-level key in the system.json file to set the port number. The following example demonstrates how to configure Glue42 Enterprise to use a random free port for each of its instances by setting the Glue42 Gateway port to 0:
{
    "gw": {
        "configuration": {
            "port": 0
        }
    }
}
The following example demonstrates creating a system configuration file for a "PROD" environment and an "EMEA" region, named system-PROD-EMEA.json. The port for the Glue42 Gateway isn't specified, as it is set to 0 in the common system configuration file. The only setting that will be overridden is for the app stores under the "appStores" top-level key:
// system-PROD-EMEA.json
{
    "env": "PROD",
    "region": "EMEA",
    "appStores": [
        {
            "type": "rest",
            "details": {
                "url": "https://my-domain.com/my-app-store",
                "auth": "no-auth",
                "pollInterval": 30000,
                "enablePersistentCache": true,
                "cacheFolder": "%LocalAppData%/Tick42/UserData/%GLUE-ENV%-%GLUE-REGION%/gcsCache/"
            }
        }
    ]
}
Keep in mind that by default Glue42 Enterprise is configured to create sub-folders for each environment/region in the UserData and Cache folders by using the %GLUE-ENV% and %GLUE-REGION% environment variables:
{
    "folders": {
        "userData": "%LocalAppData%/Tick42/UserData/%GLUE-ENV%-%GLUE-REGION%/",
        "cache": "%LocalAppData%/Tick42/Cache/%GLUE-ENV%-%GLUE-REGION%/"
    }
}
This means that the information stored in these folders by default will be separated per environment/region. To avoid overwriting data in case you decide to change the locations of UserData and Cache in your base configuration, either use the %GLUE-ENV% and %GLUE-REGION% environment variables to create sub-folders for each environment/region, or make sure that each environment/region configuration file specifies different locations for these folders.
Shortcuts
It is possible to create any number of shortcuts to Glue42 Enterprise, which will allow you to launch it with custom configuration according to your requirements. The entry point executable is found in %LocalAppData%\Tick42\GlueDesktop\tick42-glue-desktop.exe. Running it without arguments will use the default configuration located in %LocalAppData%\Tick42\GlueDesktop\config\system.json. To override the base configuration with the specific configuration for an environment/region, use the following template to provide command line arguments for each shortcut:
tick42-glue-desktop.exe [optional Electron arguments] -- config=<base config file> configOverrides config0=<custom config override> config1=...Substitute <base config file> with the location of your base configuration file (usually config/system.json), and <custom config override> with the location of your configuration override file. It's possible to supply more than one configuration override files.
The following example demonstrates how to use the system.json file as a base configuration for Glue42 Enterprise and override it with a file named system-PROD-EMEA.json and also placed in the %LocalAppData%\Tick42\GlueDesktop\config folder:
tick42-glue-desktop.exe -- config=config/system.json configOverrides config0=config/system-PROD-EMEA.jsonNote that to specify command line arguments using a shortcut to the Glue42 Enterprise executable file, you must right click on the shortcut, select the "Properties" menu option, go to the "Target" field and add the arguments after the name of the executable file. Note the space before and after the double dash.
For details on how to automatically create shortcuts during installation when using the Glue42 Enterprise installer app for deployment, see the Installer > Shortcuts section. Otherwise, you can use PowerShell or any other deployment technology to create shortcuts.
Remote Configurations
Available since Glue42 Enterprise 3.17
The configuration of Glue42 Enterprise can be extended with configuration files hosted on the Glue42 Server or on another REST service. The configurations from the remote location will be fetched on startup of Glue42 Enterprise and will be merged with the locally available ones. You can also supply different remote configurations for each environment and region in which Glue42 Enterprise runs.
The following minimal conditions must be met in order for Glue42 Enterprise to function properly when extending its configuration with files from a remote location:
There must be a locally available
system.jsonfile and the"region","env","folders","registerHtmlContainer","switches","flash","protocolHandler","allowMultipleInstances"and"build"properties must be defined in it. All other properties of thesystem.jsonfile can be defined in a remote location file.The
stickywindows.json,channels.jsonandthemes.jsonfiles must be present locally at least as empty files. Thelogger.jsonfile must be present locally and must not be empty - there must be some configuration settings present in it.
Configuration
To enable Glue42 Enterprise to fetch configurations from a remote location, use the "remoteConfigs" top-level key of the gilding.json configuration file located in the %LocalAppData%\Tick42\GlueDesktop\config folder. This file contains settings for the so called gilding executable file, which is a thin wrapper around the actual Glue42 Enterprise executable. One of its goals is to allow Glue42 Enterprise to fetch its configurations from a remote location before initialization.
The following example demonstrates how to enable Glue42 Enterprise to fetch configuration files from a Glue42 Server:
{
    "remoteConfig": {
        "enabled": true,
        "url": "https://<URL-to-my-glue42-server>/api/systemConfig/get",
        "folder": "./config/remote-configs",
        "wipeFolder": true
    }
}
The "remoteConfig" object has the following properties, all of which are optional:
| Property | Type | Description |
|---|---|---|
"enabled" |
boolean |
If true, will enable fetching Glue42 Enterprise configurations from a remote location. |
"url" |
string |
URL pointing to a Glue42 Server or to another REST service hosting the configuration files. |
"folder" |
string |
Location relative the %LocalAppData&\Tick42\GlueDesktop folder where the configuration files will be downloaded. Defaults to the Local\Tick42\UserData\<ENV>-<REG>\configOverrides folder, where <ENV>-<REG> must be replaced with the environment and region of your Glue42 Enterprise copy - e.g., T42-DEMO. |
"wipeFolder" |
boolean |
If true, will delete previously fetched configuration files from the specified folder before downloading. |
"fileSuffix" |
string |
Suffix that will be added to the name of the configuration files - e.g., if set to "-dev", the system.json file will be downloaded and saved as system-dev.json. |
"insecureSSL" |
boolean |
If true, will allow insecure connections. |
"impersonation" |
object |
Object with "user" and "version" properties that accept strings as values. Use to override the default OS user and Glue42 Enterprise version for which to fetch configurations. |
"continueOnError" |
boolean |
If true, Glue42 Enterprise will initialize even if fetching the remote configurations fails. |
Different Environments & Regions
Available since Glue42 Enterprise 3.21
To enable fetching remote configurations per environment and region for Glue42 Enterprise, you must provide different versions of the gilding.json file for each environment and region. This way, each version of the gilding.json can have different settings for the "remoteConfig" object.
To provide a configuration file for the gilding executable as a command line argument, use the --gildingConfigFile=<file name> argument, where <file name> must be replaced with the name of your configuration file:
tick42-glue-desktop.exe --gildingConfigFile=gilding-DEV.jsonYou can also create different versions of the gilding.json file, named by using the gilding-<environment>-<region>.json pattern, where <environment> and <region> must be replaced with the environment and region in which Glue42 Enterprise will run. For instance, if a file is named gilding-DEV-EMEA.json, the configuration in it will be used when Glue42 Enterprise is started with the following system settings:
// In `system.json`.
{
    "env": "DEV",
    "region": "EMEA"
}
The environment and region specifiers in the file name are case insensitive, so naming your file gilding-DEV-EMEA.json or gilding-dev-emea.json makes no difference.
Notifications
You can filter the Glue42 Notifications notifications, enable or disable notification toasts and specify their size and duration through configuration. For more details on how to configure the default notification apps or your custom Notifications App, see the Notifications section.
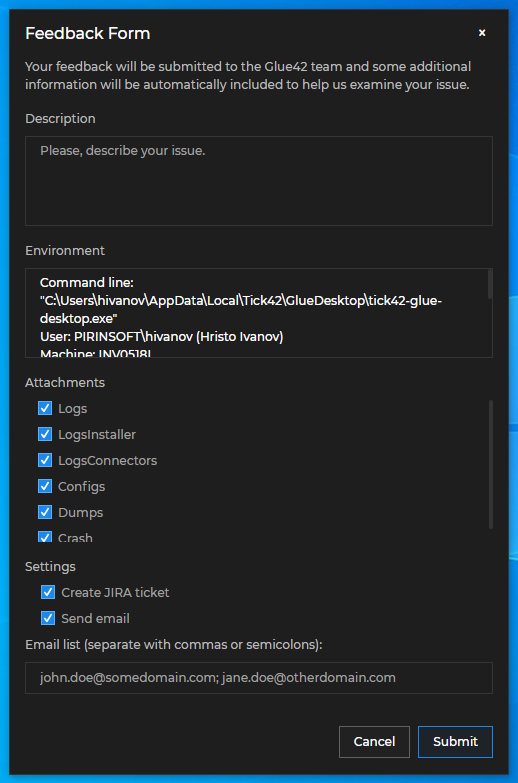
Issue Reporting
Glue42 Enterprise has a built-in Feedback Form that allows users to send feedback with improvement suggestions or bug reports. The form can be configured to send an email with the report to the Glue42 team and/or to automatically create a Jira ticket with the issue reported by the user. Both on-premise and cloud-based Jira solutions are supported. For more details, see the Glue42 Platform Features > Issue Reporting section.
Feedback Button
Available since Glue42 Enterprise 3.17
The Feedback Form can be opened directly from an app instance by using the "Feedback" button in the app window header. The "Feedback" button is disabled by default and can be enabled globally from the system configuration of Glue42 Enterprise or per app from the app configuration file. The app configuration will override the global system configuration. For more details, see the Glue42 Platform Features > Issue Reporting > Feedback Button section.
Configuration
The Feedback Form is configurable on a system level from the system.json file of Glue42 Enterprise. For more details, see the Glue42 Platform Features > Issue Reporting > Configuration section.
Dialogs
Available since Glue42 Enterprise 3.18
Glue42 Enterprise offers default confirmation dialogs that will be shown on system shutdown or restart and when a window that prevents closing is about to be closed. The default dialogs are configurable on a system level from the system.json file of Glue42 Enterprise. you can also show your own custom dialogs programmatically. For more details on configuring the default dialogs and showing dialogs at runtime, see the Glue42 Platform Features > Dialogs section.
Other System Configurations
Multiple Instances
To control running multiple instances of Glue42 Enterprise, use the "allowMultipleInstances" top-level key in the system.json file.
The following example demonstrates how to prevent users from running multiple instances of Glue42 Enterprise:
{
    "allowMultipleInstances": "never"
}
The "allowMultipleInstances" property accepts the following values:
| Value | Description |
|---|---|
"inDifferentEnvRegion" |
Default. Allows running multiple instances only in different environments/regions. |
"never" |
Disables running multiple instances. |
Multiple Versions
It's possible to install multiple versions of Glue42 Enterprise on the same machine. If you plan on supporting multiple installations, ensure that the different versions are installed in separate folders, and use relative paths in the system.json configuration file in order to avoid data overwriting.
Note that the MS Office Connectors are integrated with the registered MS Office app at installation time. This means that only their last-installed version will be available.
Global Protocol Handler
Available since Glue42 Enterprise 3.12
The default name of the Glue42 global protocol is glue42, but you can change this prefix using the "protocol" property of the "protocolHandler" top-level key in the system.json file of Glue42 Enterprise:
{
    "protocolHandler": {
        "protocol": "mycustomprotocol"
    }
}
The following example demonstrates how to start a Glue42 enabled app using the app protocol option after you have changed the default protocol name:
mycustomprotocol://app/clientlistClient Certificates
Available since Glue42 Enterprise 3.18
The dialog that allows the user to choose from the available client certificates (certificates used in private organizations for user identification) can be configured on a system level from the system.json file of Glue42 Enterprise. For more details, see the Glue42 Platform Features > Client Certificates section.
Logging
The logging mechanism of Glue42 Enterprise is based on log4js-node and can be customized through the logger.json configuration file. You can modify the configuration for the default log appenders used by Glue42 Enterprise or add your custom log appenders. For more details, see the Developers > Configuration > System > Logging section.