
Configuration
App Configuration
The configuration of an app is a JSON file which allows the app to be accessible to the user from the Glue42 Toolbar. It consists of base properties which are common for all types of apps, and type-specific properties located under the "details" top-level key. The required properties for all types of apps are "name", "type" and "details".
The custom user app configurations should be stored in the %LocalAppData%\Tick42\UserData\<ENV>-<REG>\apps folder where <ENV>-<REG> must be replaced with the environment and region of your Glue42 Enterprise copy (e.g., T42-DEMO). The files at this location won't be erased or overwritten in case you upgrade your version of Glue42 Enterprise.
The configuration files of the apps that come with the Glue42 Enterprise installer are located in the %LocalAppData%\Tick42\GlueDesktop\config\apps folder. For more details, see the app configuration schema.
Window
Window apps are web apps which run in a Glue42 browser window.
{
    "name":"glue42-website",
    "title":"Glue42 Website",
    "icon": "https://example.com/icon.ico",
    "type": "window",
    "details":{
        "url":"https://glue42.com",
        "mode": "tab",
        "width": 400,
        "height": 400
    }
}
The "name", "type" and "url" properties are required and "type" must be set to "window". The "url" property points to the location of the web app.
The value of the "title" property will be used as a window title and also as a name for the app in the Glue42 Toolbar. The "mode" property defines the Glue42 Window mode - "flat" (default), "tab" or "html".
For the differences between the Glue42 Window modes, see the Window Modes section.
The supported formats for the app icon are ICO, PNG, APNG and JPG.
For more details, see the app configuration schema.
Exe
An executable app which can be executed from your OS. This is a basic example for an EXE configuration:
{
    "name":"My EXE App",
    "title":"My App",
    "type": "exe",
    "details":{
         "path":"%GDDIR%/../PathToWPFApplication/",
         "command": "WPFApplication.exe",
         "parameters": "param1 param2",
         "width": 400,
         "height": 400
    }
}
Note that currently size constraints properties (e.g., "width", "height", "maxWidth", "minHeight", etc.) are only valid for EXE apps that are registered as Glue42 Windows.
The "name", "type" and "path" properties are required and "type" must be set to "exe". The "path" property points to the app working directory. The "command" property accepts the actual command to execute - the EXE file name. To specify command line parameters for starting the app, use the "parameters" property.
For more details, see the app configuration schema.
ClickOnce
The following example demonstrates how to configure a Glue42 enabled ClickOnce app:
{
    "title": "My ClickOnce App",
    "type": "clickonce",
    "name": "my-clickonce-app",
    "details": {
        "url": "https://example.com/my-clickonce-app.application",
        "width": 1000,
        "height": 400,
        "appParameters": [
            {
                "name": "p1",
                "value": "customParameter"
            }
        ]
    }
}
The "name", "type" and "url" properties are required and "type" must be set to "clickonce". The "url" property points to the physical location where the ClickOnce app is deployed and from where it will be installed on the user machine.
The "appParameters" property is an array of objects defining custom parameters that your app can access at runtime through glue.GDStartingContext.ApplicationConfig.Details.AppParameters. Each object sets the "name" and the "value" of a custom parameter.
For more details, see the app configuration schema.
Batch file
Batch files can also be included as Glue42 Enterprise apps.
The following example demonstrates how to configure a batch file:
{
    "title":"My Batch File",
    "name":"my-batch-file",
    "type": "exe",
    "details":{
         "path":"%GDDIR%/../PathToMyBatchFile/",
         "command": "my-batch-file.bat",
         "parameters": "param1 param2",
         "width": 400,
         "height": 400
    }
}
The "name", "type" and "path" properties are required and "type" must be set to "exe". The "path" property points to the app working directory. The "command" property accepts the actual command to execute - the BAT file name. To specify command line parameters for starting the app, use the "parameters" property.
For more details, see the app configuration schema.
Node.js
Both locally and remotely hosted apps running in a Node.js environment can participate in Glue42. It is also possible to specify different Node.js versions for the different apps.
Local
The following example demonstrates how to configure an app which runs locally in a Node.js environment:
{
    "name": "node-server",
    "type": "node",
    "service": true,
    "details": {
        "path": "%GDDIR%/PathToMyServer/index.js",
        "nodeVersion": "16.13.2",
        "showConsole": true
    }
}
The "name", "type" and "path" properties are required and "type" must be set to "node". The "path" property points to a JavaScript file that Glue42 Enterprise will execute in a Node.js environment.
Use the "nodeVersion" property to specify a Node.js version for the app.
For more details on how to name and where to place the different Node.js versions, see the Using Different Node.js Versions section).
For more details, see the app configuration schema.
Remote
Available since Glue42 Enterprise 3.14
Note that remotely hosted Node.js apps are subject to certain restrictions when participating in Glue42. Glue42 Enterprise will fetch and execute only the file specified in the app configuration, so your remote app must be bundled into a single file and must not depend on any packages with native code that can't be bundled with it.
The following example demonstrates how to configure an app which runs remotely in a Node.js environment:
{
    "name": "node-server",
    "type": "node",
    "service": true,
    "details": {
        "remote": {
            "url": "https://example.com/node-server/bundled.js",
            "noCache": true
        },
        "showConsole": true
    }
}
The "name", "type" and "url" properties are required and "type" must be set to "node". The "url" property points to a single bundled JavaScript file that Glue42 Enterprise will fetch and execute in a Node.js environment.
The "service" property can be used to specify that this is a service app and shouldn't be closed when saving and restoring a Layout. The "showConsole" property can be used to specify whether the Node.js console should be visible or not.
The "remote" object has the following properties:
| Property | Type | Description |
|---|---|---|
"url" |
string |
The URL to the JavaScript file to be fetched and executed in Node.js. |
"headers" |
object[] |
Set of headers that will be added to the request for downloading the script file. Each object in the array must have valid "name" and "value" properties holding the header name and the respective value. |
"noCache" |
boolean |
If true, the Cache-control: no-cache header will be added. |
For more details, see the app configuration schema.
Using Different Node.js Versions
Available since Glue42 Enterprise 3.14
Glue42 Enterprise comes with a default Node.js version, but also allows you to specify a Node.js version per app using the "nodeVersion" property of the app configuration. The default Node.js environment is named node.exe and is located in the %LocalAppData%\Tick42\GlueDesktop\assets\node folder. The default path to the Node.js environment is specified using the "nodePath" top-level key in the system.json configuration file of Glue42 Enterprise. All additional Node.js executable files must be placed in the same specified folder and their names must be in the format node-[version].exe (e.g., node-16.13.2.exe), in order for Glue42 Enterprise to be able to find the correct version for each Node.js app.
Citrix App
A Citrix Virtual App can be configured just like any other Glue42 enabled app. It can participate in the Glue42 environment as a first-class citizen and use all Glue42 functionalities. A Citrix app must be configured as a "citrix" type and the "name" property in the "details" key must be set with the exact published name of the Citrix app. Use the "parameters" property under "details" to pass command line arguments for starting the app.
The following demonstrates a basic Citrix app configuration:
{
    "title": "Client List - Citrix",
    "type": "citrix",
    "name": "clientlist-citrix",
    "details": {
        "name": "Client List",
        "parameters": "--mode=3 --clients=http://localhost:22060/clients",
        "left": 100,
        "top": 100,
        "width": 600,
        "height": 700
    }
}
For system-wide Citrix configuration, see the System Configuration section.
Service Window
Service windows are a specific usage of a window app. They can provide data and enhance other apps throughout the Glue42 Enterprise life cycle. The service window is defined as an app that is hidden and may be auto started when Glue42 Enterprise is initiated.
There are different ways to configure a service window, depending on whether you want the window to be automatically started when Glue42 Enterprise is initiated. Use a combination of the following app configuration properties to specify whether the window should be automatically started, invisible, or hidden from the Glue42 Toolbar:
| Property | Type | Description |
|---|---|---|
"service" |
boolean |
If true, both the "autoStart" top-level key and the "hidden" property of the "details" object will be overridden and set to true. The window will be invisible and will start automatically on Glue42 Enterprise startup. |
"hidden" |
boolean |
If true, the app won't be available in the Glue42 Toolbar. |
"autoStart" |
boolean |
If true, the window will be started automatically on Glue42 Enterprise startup. |
"details" |
object |
Use the "hidden" Boolean property of the "details" object to set the window visibility. If true, the window will be invisible. |
Note that when using the "service" property, it's pointless to use the "autoStart" top-level key and the "hidden" property of the "details" object, because the "service" key will override any values you may set for them.
The following example demonstrates how to use the "service" and "hidden" top-level keys to configure a service window that will start automatically, will be invisible and hidden from the Glue42 Toolbar:
{
    "name": "service-window",
    "type": "window",
    "service": true,
    "hidden": true,
    "details": {
        "url": "https://example.com/my-service-window",
    }
}
The "name", "type" and "url" properties are required and "type" must be set to "window". The "url" property points to the location of the web app.
The following example demonstrates how to use the "hidden" and "autoStart" top-level keys and the "hidden" property of the "details" top-level key to configure a service window that will be hidden from the Glue42 Toolbar, won't start automatically and will be invisible:
{
    "name": "service-window",
    "type": "window",
    "hidden": true,
    "autoStart": false,
    "details": {
        "url": "https://example.com/my-service-window",
        "hidden": true
    }
}
The "hidden" property in the "details" object will make the window invisible, while the "hidden" top-level key will hide the app from the Glue42 Toolbar so that it won't be accessible to the user.
Note that service windows aren't closed when restoring a Layout.
For more details, see the app configuration schema.
Frameless Window
Available since Glue42 Enterprise 3.15
Frameless windows are based on HTML windows, but allow for creating apps with freeform (non-rectangular) shapes and transparent areas. They don't have the usual Glue42 Window decorations - title bars, standard system buttons ("Minimize", "Maximize", "Close"), resizing areas, and can't be dragged (unless you define a custom draggable area within the web app), can't be dropped in Workspaces or stuck to other Glue42 Windows. Frameless windows can be saved and restored in Layouts and can use all Glue42 functionalities provided by the Glue42 libraries.
The following demonstrates a basic frameless window configuration:
{
    "name":"frameless-app",
    "icon": "https://example.com/icon.ico",
    "type": "window",
    "details":{
        "url":"http://localhost:3000",
        "mode": "frameless",
        "width": 400,
        "height": 400
    }
}
The "name", "type" and "url" properties are required and "type" must be set to "window". The "mode" property must be set to "frameless". The "url" property points to the location of the web app.
Workspaces App
A Workspaces App is a web app that can host Glue42 Workspaces.
Note that Glue42 Enterprise expects only one app definition for a Workspaces App - i.e., one configuration file with "type" property set to "workspaces". If multiple Workspaces App definitions are present, the first available one will be used.
Glue42 Enterprise comes with a Workspaces UI app and a configuration file for it named workspaces.json and located in %LocalAppData%\Tick42\GlueDesktop\config\apps. If you are creating your custom Workspaces App, make sure to modify or replace this file with your own configuration file, or delete it, if your app configurations are stored at another location.
The "type" property must be set to "workspaces":
{
    "title": "Workspaces UI",
    "type": "workspaces",
    "name": "workspaces-demo",
    "icon": "http://localhost:22080/resources/icons/workspaces.ico",
    "details": {
        "layouts": [],
        "url": "http://localhost:3000"
    },
    "customProperties": {}
}
The "type" and "name" top-level properties are required and "type" must be set to "workspaces". The "url" and "layouts" properties in the "details" object are optional.
Use "url" to specify where the app is hosted, otherwise it will default to the Workspaces App template distributed with Glue42 Enterprise.
Defining Workspace Layouts
Use the "layouts" property to predefine Workspace layouts that will be loaded automatically when the Workspace App starts:
{
    "details": {
        "layouts": [
            // Standard Workspace layout definition.
            {
                "children": [
                    {
                        "type": "column",
                        "children": [
                            {
                                "type": "group",
                                "children": [
                                    {
                                        "type": "window",
                                        "appName": "clientlist"
                                    }
                                ]
                            },
                            {
                                "type": "group",
                                "children": [
                                    {
                                        "type": "window",
                                        "appName": "clientportfolio"
                                    }
                                ]
                            }
                        ]
                    }
                ]
            },

            // Or a simpler Workspace layout definition for an already existing layout.
            {
                "layoutName": "My Workspace"
            }
        ]
    }
}
Use the "config" property of the standard Workspace layout object or the "restoreConfig" property of the simpler object to pass context to the Workspace or to hide/show its tab header:
{
    "details": {
        "layouts": [
            // Standard Workspace layout definition.
            {
                "children": [],
                "config": {
                    "noTabHeader": true,
                    "context": { "glue" : 42 }
                }
            },

            // Or a simpler Workspace layout definition for an already existing layout.
            {
                "layoutName": "My Workspace",
                "restoreConfig": {
                    "noTabHeader": true,
                    "context": { "glue" : 42 }
                }
            }
        ]
    }
}
Hiding the Workspace tab header with the "noTabHeader" property prevents the user from manipulating the Workspace through the UI and allows for the Workspace to be controlled entirely through API calls. For instance, a Workspace may be tied programmatically to certain logic, a button, etc., designed to manage its state without any user interaction.
Web Group App
A Web Group App is a web app used in Glue42 Enterprise for handling Glue42 web groups.
By default, Glue42 Enterprise will search for а registered app with the name "glue42-web-group-application" and if one is available, will use it as the Web Group App. If no such app is found, the first available app definition of type "webGroup" will be used. Note that Glue42 Enterprise expects only one app definition for a Web Group App - i.e., one configuration file with "type" property set to "webGroup". If multiple Web Group App definitions are present, the first one will be used.
Glue42 Enterprise comes with a Web Group App and a configuration file for it named webGroup.json and located in %LocalAppData%\Tick42\GlueDesktop\config\apps. If you are creating your custom Web Group App, make sure to modify or replace this file with your own configuration file, or delete it, if your app configurations are stored at another location.
The "type" property must be set to "webGroup":
{
    "name": "web-group-app",
    "title": "Web Group App",
    "type": "webGroup",
    "hidden": true,
    "details": {
        "url": "http://localhost:3000/",
        "autoOpenDevTools": true,
        "preloadScripts": ["https://example.com/my-script.js"],
        "pool": {
            "min": 5
        }
    }
}
The "url" property is required and must point to the location of your custom Web Group App.
Use the "autoOpenDevTools" property to automatically open the Chrome Dev Tools (disabled by default) when debugging your Web Group App.
Use the "preloadScripts" property to specify a list of URLs pointing to scripts that will be loaded and executed before loading the Web Group App.
Use the "pool" property to specify the minimum number of cached Web Group App instances (default is 3) used for improving group performance and user experience. The higher the number, the more memory will be consumed; the lower the number, the higher the chance to experience delay during web group operations.
The "hidden" property is set to true in order to hide the Web Group App from the Glue42 Toolbar, because this is a service app used directly by Glue42 Enterprise to handle Glue42 Window groups.
App Default Layout
The App Default Layout contains information about:
- the last saved window bounds - size and location;
- the window state - maximized, minimized or normal and whether it's collapsed;
- the default window context;
When an app is started for the first time by Glue42 Enterprise, the size and the location of the app window are determined by the bounds set in the app configuration file (or by the default bounds, if none are specified in the app configuration). When the user moves or resizes the app window and closes it, the new bounds are automatically saved as an App Default Layout and the next time the app is started, its window will be loaded using these bounds.
Sometimes, it may be necessary to bypass the App Default Layout - e.g., if somehow the app window has been saved outside the visible monitor area, or you simply want your app to always start with certain bounds, state or context despite the user interactions.
To bypass the App Default Layout only once, press and hold the SHIFT key and click on the app in the Glue42 Toolbar to start it.
To instruct Glue42 Enterprise to always ignore the App Default Layout for your app, use the "ignoreSavedLayout" top-level key in the app configuration file:
{
    "ignoreSavedLayout": true
}
Persisting Current URLs
Available since Glue42 Enterprise 3.21
To persist the current URL of a web app when a Layout is saved (App Default, Global Layouts, or Workspaces), use the "saveCurrentUrlInLayout" property of the "details" top-level key. It accepts a Boolean value, or an array of strings specifying the Layout types for which the current URL of the web app will be persisted. The possible string values are "ApplicationDefault", "Global", and "Worksapace". Persisting the current URL of a web app allows users to automatically restore its last saved navigation state.
The following example demonstrates how to persist the current URL of a web app only when it participates in Global Layouts and Workspaces:
{
    "details": {
        "saveCurrentUrlInLayout": ["Global", "Workspace"]
    }
}
The following example demonstrates how to persist the current URL of a web app in all types of Layouts:
{
    "details": {
        "saveCurrentUrlInLayout": true
    }
}
Saving current URLs of web apps can also be controlled globally from the system configuration.
Persisting Current Window Titles
Available since Glue42 Enterprise 3.23
To persist the current window title of a web app when a Layout is saved (App Default, Global Layouts, or Workspaces), use the "saveCurrentTitleInLayout" property of the "details" top-level key. It accepts a Boolean value, or an array of strings specifying the Layout types for which the current window title of the web app will be persisted. The possible string values are "ApplicationDefault", "Global", and "Worksapace".
The following example demonstrates how to persist the current window title of a web app only when it participates in Global Layouts and Workspaces:
{
    "details": {
        "saveCurrentTitleInLayout": ["Global", "Workspace"]
    }
}
The following example demonstrates how to persist the current window title of a web app in all types of Layouts:
{
    "details": {
        "saveCurrentTitleInLayout": true
    }
}
Saving current window titles of web apps can also be controlled globally from the system configuration.
Cascading Windows
Glue42 Windows can be opened in a cascade. Each new window is offset from the previously opened window by a specified distance:
Cascading windows is enabled by default. To specify offset for the cascaded windows, use the "cascade" property of the "details" top-level key:
{
    "details": {
        "cascade": {
            "offset": 30
        }
    }
}
The "cascade" object has the following properties:
| Property | Type | Description |
|---|---|---|
"enabled" |
boolean |
If true (default), will enable cascading windows. |
"offset" |
number |
Offset in pixels for the cascaded window. |
The settings for cascading windows can also be controlled globally from the system configuration.
Remote Archived Apps
Available since Glue42 Enterprise 3.20
Glue42 Enterprise can download, unarchive and run archived web or native apps hosted at a remote location. To specify the location of your archived app and headers for the request, use the "assets" top-level key.
The "assets" object has the following properties:
| Property | Type | Description |
|---|---|---|
"src" |
string |
URL pointing to the location of the archived app that will be downloaded and extracted. |
"headers" |
object[] |
Array of objects, each with required "name" and "value" properties, defining the headers that will be added to the request for downloading the archived app. |
"noCache" |
boolean |
If true, the Cache-Control: no-cache header will be added. |
The following example demonstrates how to define the location of a remote archived web app, specify headers for the request, include the Cache-Control: no-cache header, and define the app entry point:
{
    "name": "my-archived-web-app",
    "type": "window",
    "asset": {
        "src": "https://example.com/my-archived-web-app.zip",
        "headers": [
            {
                "name": "header-name",
                "value": "header-value"
            }
        ],
        "noCache": true
    },
    "details": {
        "url": "$ASSET_LOCATION$/home.html"
    }
}
Note that if you don't specify an entry point for your web app in the "url" property, Glue42 Enterprise will try to access it via an index.html file.
The following example demonstrates how to define the location of a remote archived native app:
{
    "name": "my-archived-native-app",
    "type": "exe",
    "asset": {
        "src": "http://example.com/my-archived-native-app.zip"
    },
    "details": {
        "command": "MyArchivedNativeApp.exe",
        "path": "$ASSET_LOCATION$"
    }
}
The default location for downloading remote apps is %LocalAppData%/Tick42/UserData/%GLUE-ENV%-%GLUE-REGION%/remoteApps/<app-name> where <app-name> is the name of the app as defined in its configuration. You can use the $ASSET_LOCATION$ macro pointing to the default location of the extracted app when defining the "path" or the "url" property of your app, depending on its type.
For details on specifying locations for the system folders of Glue42 Enterprise, see the Developers > Configuration > System section.
Placement
Available since Glue42 Enterprise 3.11
The placement settings allow a Glue42 Window to occupy a specific position on the screen. This position can be set only once - initially, on window creation, or can be kept throughout the entire lifetime of the window. The placement feature solves the problem of reacting adequately to changes of the screen resolution or the size of the app virtualization window hosting the Glue42 Window, ensuring that the Glue42 Window always stays at the desired screen position and with the desired dimensions. This is especially useful if you are developing a toolbar or a notifications panel that shouldn't be resized by the users and must always stay at the same position on the screen.
To specify window placement settings, use the "placement" property of the "details" top-level key. The following example demonstrates how to place a window at the top center of the screen. The window will be 50 pixels high, its width will be 30% of the screen width, and there will be a 10 pixel margin between the top edge of the screen and the top of the window:
{
    "details": {
        "placement": {
            "snapped": true,
            "verticalAlignment": "top",
            "horizontalAlignment": "center",
            "height": 50,
            "width": "30%",
            "top": 10
        }
    }
}
The "placement" object has the following properties:
| Property | Accepts | Description |
|---|---|---|
"snapped" |
boolean |
Required. If true, the Glue42 Window will remain snapped to the specified screen position even in cases of resolution changes, window visibility changes or when the app virtualization window hosting the Glue42 Window has been resized. However, this doesn't include any API calls or manual user interaction which affect the window placement or bounds. If false, the window will be positioned at the specified screen location only once when created. |
"verticalAlignment" |
"top" | "bottom" | "center" | "stretch" |
Defines a vertical alignment configuration. If "horizontalAlignment" is set, then "verticalAlignment" will default to "stretch". |
"horizontalAlignment" |
"left" | "right" | "center" | "stretch" |
Defines a horizontal alignment configuration. If "verticalAlignment" is set, then "horizontalAlignment" will default to "stretch". |
"width" |
number | string |
Defines the window width. Use a number to define the value in pixels, or use a string to define the value in pixels or in percentage of the screen - e.g., "10px" or "10%". |
"height" |
number | string |
Defines the window height. Use a number to define the value in pixels, or use a string to define the value in pixels or in percentage of the screen - e.g., "10px" or "10%". |
"display" |
Display |
Defines the current display. |
"top" |
number | string |
Top margin for the placed window. Use a number to define the value in pixels, or use a string to define the value in pixels or in percentage of the screen - e.g., "10px" or "10%". Available since Glue42 Enterprise 3.20. |
"left" |
number | string |
Left margin for the placed window. Use a number to define the value in pixels, or use a string to define the value in pixels or in percentage of the screen - e.g., "10px" or "10%". Available since Glue42 Enterprise 3.20. |
"right" |
number | string |
Right margin for the placed window. Use a number to define the value in pixels, or use a string to define the value in pixels or in percentage of the screen - e.g., "10px" or "10%". Available since Glue42 Enterprise 3.20. |
"bottom" |
number | string |
Bottom margin for the placed window. Use a number to define the value in pixels, or use a string to define the value in pixels or in percentage of the screen - e.g., "10px" or "10%". Available since Glue42 Enterprise 3.20. |
Note that in order for the bounds specified in the placement settings to be respected when the app is restarted, you must set the "ignoreSavedLayout" top-level key to true, otherwise the App Default Layout, in which the last known bounds of the window are recorded, will take precedence when restoring the window.
For details on how to specify placement settings programmatically, see the Window Management section.
Grouping Apps
Available since Glue42 Enterprise 3.10
Apps can be grouped in folders and subfolders in the Glue42 Toolbar via configuration:
To group apps in folders/subfolders, use the "customProperties" top-level key in the app configuration file:
{
    "name":"ClientList",
    "title":"Client List",
    "icon": "http://localhost:22080/resources/icons/tick42.ico",
    "type": "window",
    "customProperties": {
        "folder": "Clients"
    },
    "details":{
         "url":"http://localhost:3000/client-list"
    }
}
The configuration below shows how to group apps in a subfolder:
{
    "customProperties": {
        "folder": "Clients/Corporate"
    }
}
Excluding & Including Apps in Workspaces
To control whether an app will be available in the Workspace "Add Application" menu (the dropdown that appears when you click the "+" button to add an app), use the "includeInWorkspaces" property of the "customProperties" top-level key in your app configuration:
{
    "customProperties": {
        "includeInWorkspaces": true
    }
}
By default, this property is set to false, which means that by default apps aren't visible in the "Add Application" dropdown menu of the Workspaces App.
Available since Glue42 Enterprise 3.17
To prevent an app from participating in Workspaces, set the "allowWorkspaceDrop" top-level key in the app configuration to false:
{
    "allowWorkspaceDrop": false
}
By default, this property is set to true, which means that by default users are able to drag and drop apps in a Workspace.
Sticky Group
Available since Glue42 Enterprise 3.19
To create groups of windows that will stick only to each other, but not to other windows that don't have the same sticky group, use the "stickyGroup" property of the "details" top-level key:
{
"details": {
"stickyGroup": "my-sticky-group"
}
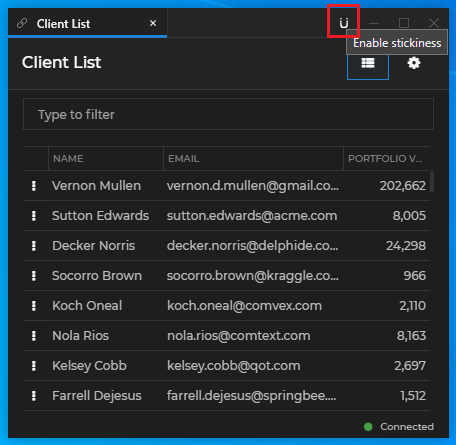
}Sticky Button
Available since Glue42 Enterprise 3.11
To enable the "Sticky" button for an app, set the "showStickyButton" property of the "details" top-level key to true:
{
    "details": {
        "showStickyButton": true
    }
}
Feedback Button
Available since Glue42 Enterprise 3.17
To enable the "Feedback" button for an app, set the "showFeedbackButton" property of the "details" top-level key to true:
{
    "details": {
        "showFeedbackButton": true
    }
}
Use the "supportEmails" top-level key to specify the emails of the app owners. The email addresses defined in this property will be added to the Feedback Form if it has been triggered from that app:
{
    "supportEmails": ["app.owner1@example.com", "app.owner2@example.com"]
}
The "Feedback" button can also be enabled or disabled globally from the system configuration.
Collapse & Expand
Glue42 Windows can be collapsed and expanded, including when in a window group:
By default, the button for collapsing and expanding windows is disabled. To enable it, use the "allowCollapse" property of the "details" top-level key:
{
    "details": {
        "allowCollapse": true
    }
}
Jump List
Available since Glue42 Enterprise 3.15
To configure the jump list for an app, use the "jumpList" property of the "details" top-level key:
{
    "details": {
        "jumpList": {
            "enabled": true,
            "categories": [
                {
                    "title": "Tasks",
                    "actions": [
                        {
                            "icon": "%GDDIR%/assets/images/center.ico",
                            "type": "centerScreen",
                            "singleInstanceTitle": "Center on Primary Screen",
                            "multiInstanceTitle": "Center all on Primary Screen"
                        }
                    ]
                }
            ]
        }
    }
}
The "jumpList" object has the following properties:
| Property | Type | Description |
|---|---|---|
"enabled" |
boolean |
If true (default), will enable the jump list. |
"categories" |
object[] |
Categorized lists with actions to execute when the user clicks on them. |
Each object in the "categories" array has the following properties:
| Property | Type | Description |
|---|---|---|
"title" |
string |
Title of the category to be displayed in the context menu. |
"actions" |
object[] |
List of actions contained in the category. |
Each object in the "actions" array has the following properties:
| Property | Type | Description |
|---|---|---|
"icon" |
string |
Icon for the action to be displayed in the context menu. Must point to a local file. |
"type" |
string |
Type of the predefined action to execute. |
"singleInstanceTitle" |
string |
Title of the action to be displayed in the context menu when there is a single instance with a single taskbar icon. |
"multiInstanceTitle" |
string |
Title of the action to be displayed in the context menu when there are multiple instances with grouped taskbar icons. |
For more information, see Glue42 Platform Features > Jump List.
Resizing Areas
Resizing Glue42 Windows in HTML mode can be enabled or disabled by using the "hasSizeAreas" property of the "details" top-level key:
{
    "name": "My App",
    "type": "window",
    "details": {
        "url": "https://my-app.com",
        "mode": "html",
        "hasSizeAreas": false
    }
}
Available since Glue42 Enterprise 3.24
The "hasSizeAreas" property can now be used for all Glue42 Window modes. This allows you to add resizing areas even to the Glue42 frameless windows so that the user can resize them manually:
{
    "name": "My App",
    "type": "window",
    "details": {
        "url": "https://my-app.com",
        "mode": "frameless",
        "hasSizeAreas": true
    }
}
Note that, by default, "hasSizeAreas" is set to true for flat, tab and HTML windows, and to false for frameless windows.
Keywords
Available since Glue42 Enterprise 3.17
Use the "keywords" top-level key to specify a list of keywords for the app, which can be accessed through the JavaScript App Management API and used for filtering and searching for apps:
{
    "keywords": ["keyword1", "keyword2"]
}
Accessing the list of app keywords:
const keywords = glue.appManager.application("MyApp").keywords;Sending POST Data & Uploading Files
Available since Glue42 Enterprise 3.17
To upload files or send POST data from web apps, use the "urlLoadOptions" property of the "details" top-level key:
{
    "details": {
        "urlLoadOptions": {
            "extraHeaders": "Content-Type: application/x-www-form-urlencoded",
            "postData": [
                {
                    "type": "base64",
                    "data": "base64-encoded-string"
                }
            ]
        }
    }
}
For more details on the available options, see the "urlLoadOptions" property in the application.json schema.
Configuration Validator
A free Glue42 Configuration Validator tool is available and you can install it as a Visual Studio Code extension. The validator tool has several functionalities:
- Performs real time validation of JSON files on save or change of the active editor.
- Can generate template configurations for different types of Glue42 apps -
"window","exe","node"and Service Windows. - Can deploy (copy) the created configuration to a specified app configuration folder.
For more detailed information, see the README file of the Glue42 Configuration Validator.