How to...
Referencing
To use any Glue42 Enterprise functionality, you need to reference the Glue42 .NET library (either as a standalone Glue42.dll file or as a NuGet package), instantiate and initialize a class called Glue42, which provides access to the different Glue42 Enterprise functionalities.
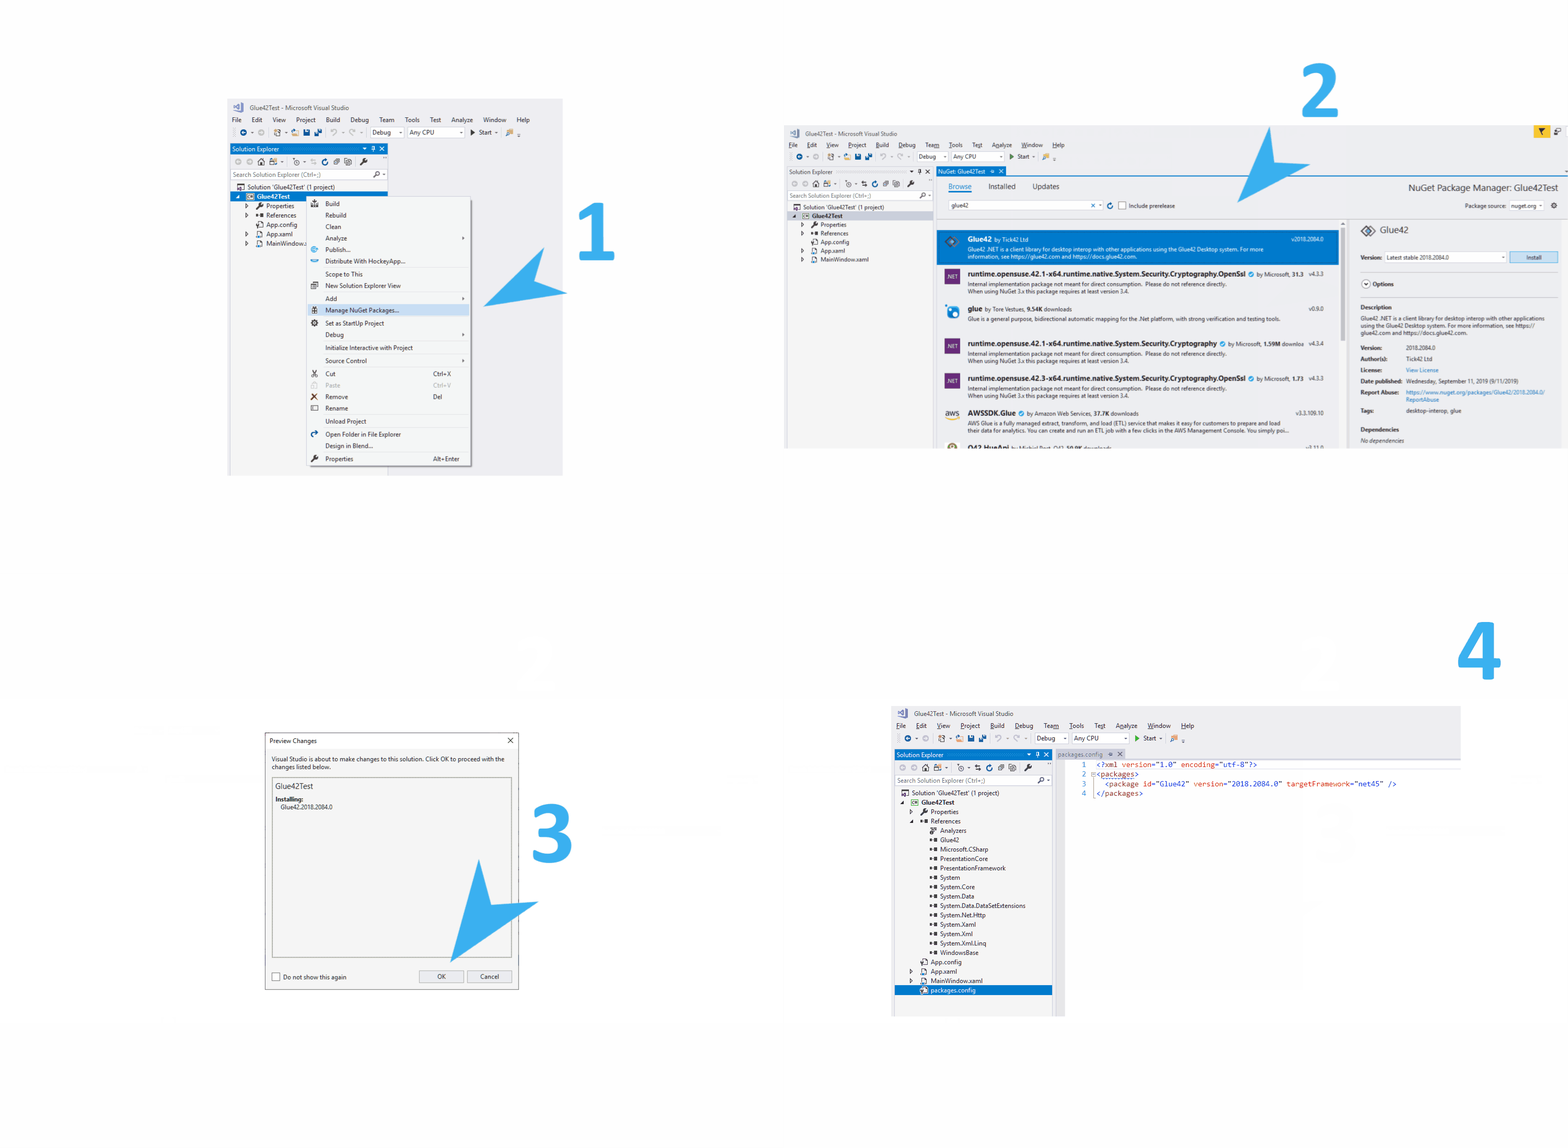
As a NuGet Package
The Glue42 .NET library is available as a NuGet package which you can include and configure in your projects.

As a Standalone File
Another option is to reference the Glue42.dll - the file is delivered with the Glue42 Enterprise installer and is located in %LOCALAPPDATA%\Tick42\GlueSDK\Glue42NET\lib\net45\Glue42.dll (you can alternatively use the NUPKG package located in %LOCALAPPDATA%\Tick42\GlueSDK\Glue42NET);
<Reference Include="Glue42">
    <HintPath>..\lib\Glue42.dll</HintPath>
</Reference>
Initialization
The .NET Glue42 library is initialized asynchronously with an optional InitializeOptions object, in which you can specify what Glue42 features you want your app to use.
Here is an example initialization:
var initializeOptions = new InitializeOptions()
    {
        ApplicationName = "cl-wpf1",
        IncludedFeatures = GDFeatures.UseAppManager | GDFeatures.UseGlueWindows
    };

// The initialization options aren't required.
// If skipped, Glue42 will be initialized with the default options
// (default assembly name for ApplicationName and with all features included).

Glue42 glue;

Glue42.InitializeGlue(initializeOptions)
    .ContinueWith(glueInit =>
        {
            glue = glueInit.Result;
            // Use Glue42 here.
        });
Note that after initializing the Glue42 library, you may want to register the windows of your .NET app as Glue42 Windows in order to be able to use Glue42 functionalities. For more details on how to do that correctly and the pitfalls to avoid during window registration, see the Window Management > Glue42 Window section.
App Configuration
To add your .NET app to the Glue42 Toolbar, you must create a JSON file with app configuration. Place this file in the %LocalAppData%\Tick42\UserData\<ENV>-<REG>\apps folder, where <ENV>-<REG> must be replaced with the environment and region of your Glue42 Enterprise copy (e.g., T42-DEMO).
Note that you can also launch manually your Glue42 enabled .NET app and it will automatically register itself and its child windows in the Glue42 Enterprise in-memory store. In this case, your app will be available in the Glue42 environment until the next restart of Glue42 Enterprise. This is useful if you have a multi window Glue42 enabled app with dynamic Glue42 enabled child windows (e.g., different user configurations, software updates, etc.) - when your main window starts its child windows, they will be registered automatically.
The following is an example configuration for a .NET app:
{
    "title": "Client List WPF v1",
    "type": "exe",
    "name": "cl-wpf1",
    "icon": "https://enterprise-demos.tick42.com/resources/icons/w1.jpg",
    "details": {
        "path": "%GDDIR%/../Demos/ClientProfileDemo/",
        "command": "ClientProfileDemo.exe",
        "parameters": " --mode=1"
    }
}| Property | Description |
|---|---|
"type" |
Must be "exe". |
"path" |
The path to the app - relative or absolute. You can also use the %GDDIR% environment variable, which points to the Glue42 Enterprise installation folder. |
"command" |
The actual command to execute (the EXE file name). |
"parameters" |
Specifies command line arguments. |
For more detailed information about the app definitions, see the Configuration documentation.
See the .NET examples on GitHub which demonstrate various Glue42 Enterprise features.
Glue42 ClickOnce
Glue42 Enterprise offers support for ClickOnce apps. Below you can see how to initialize the Glue42 .NET library in your ClickOnce app and how to register a ClickOnce app in Glue42 Enterprise.
Initialization
In a ClickOnce app, the .NET Glue42 library is initialized the same way as in other .NET apps:
var initializeOptions = new InitializeOptions()
    {
        ApplicationName = "ClientProfileDemo",
        IncludedFeatures = GDFeatures.UseAppManager | GDFeatures.UseGlueWindows
    };

// The initialization options aren't required.
// If skipped, Glue42 will be initialized with the default options
// (default assembly name for ApplicationName and with all features included).

Glue42 glue;
Glue42.InitializeGlue(initializeOptions)
                .ContinueWith(glueInit =>
                    {
                        glue = glueInit.Result;
                        // Use Glue42 here.
                    });
You can also set methods for saving and restoring the state of your Glue42 enabled ClickOnce app:
initializeOptions.SetSaveRestoreStateEndpoint(GetState, RestoreState);GetState and RestoreState are user defined methods for what information about the ClickOnce app state to save and later restore.
Registering ClickOnce Apps
To show your ClickOnce app in the Glue42 Toolbar, you must create a configuration JSON file and add it to the app configuration store.
Here is an example configuration for a ClickOnce app:
{
    "title": "Client List - ClickOnce",
    "type": "clickonce",
    "name": "cl-clickonce",
    "hidden": false,
    "details": {
        "url": "http://localhost:9091/ClickOnceClientProfileDemo.application",
        "width": 1000,
        "height": 400
    },
    "customProperties": {
        "selectedClient": "john",
        "darkThemeOn": true
    }
}| Property | Description |
|---|---|
"type" |
Must be "clickonce". |
"url" |
The web address pointing to the physical location where the ClickOnce app is deployed and from where it will be installed on the user machine. |
"customProperties" |
Context with custom parameters your app can access at runtime through glue.GDStartingContext.ApplicationConfig.CustomProperties["propertyName"]. |
Glue42 Silverlight
We offer a Glue42 Silverlight library as a version of the Glue42 .NET library. Glue42 Silverlight offers the same features and functionalities as the Glue42 .NET library, it is only tailored to meet the specifications of the MS Silverlight framework.
Glue42 .NET Concepts
Once the Glue42 .NET library has been initialized, your app has access to all Glue42 functionalities. For more detailed information on the different Glue42 concepts and APIs, see:
