
Salesforce Connector
Prerequisites
For the Salesforce Connector to function properly, before installation you must create record types for "Account", "Contact", "Event", "Lead", "Opportunity" and "Task" in your organization.
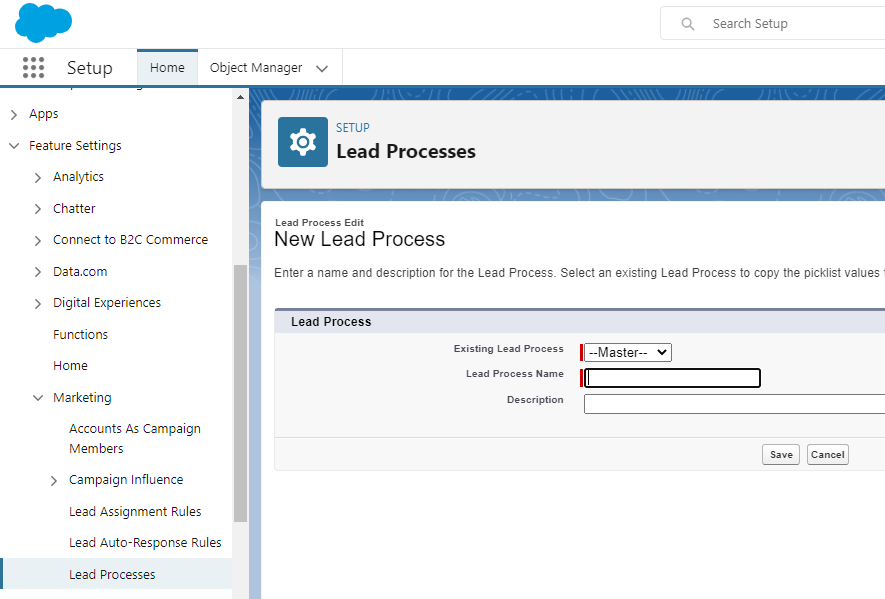
The "Lead" and "Opportunity" items require a process to be created first before creating record types for them. Navigate to Setup > Feature Settings > Marketing > Lead Processes, click "New" and create a Lead Process to associate with the record type for "Lead":
Navigate to Setup > Feature Settings > Sales > Sales Processes and similarly create a Sales Process to associate with the record type for "Opportunity".
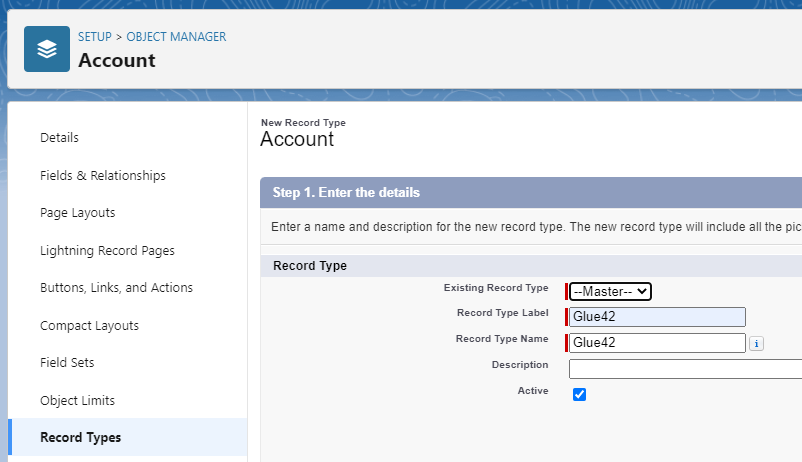
After creating the required processes, navigate to Setup > Objects and Fields > Object Manager and create the following record types:
- Go to
Account > Record Typesand add a new type with name and labelGlue42. - Go to
Contact > Record Typesand add a new type with name and labelGlue42. - Go to
Event > Record Typesand add a new type with name and labelGlue42. - Go to
Lead > Record Typesand add a new type with name and labelGlue42. If you haven't created a Lead Process already, you will be prompted to do so before creating the record type. - Go to
Opportunity > Record Typesand add a new type with name and labelGlue42. If you haven't created a Sales Process already, you will be prompted to do so before creating the record type. - Go to
Task > Record Typesand add a new type with name and labelGlue42.
Installing the Package
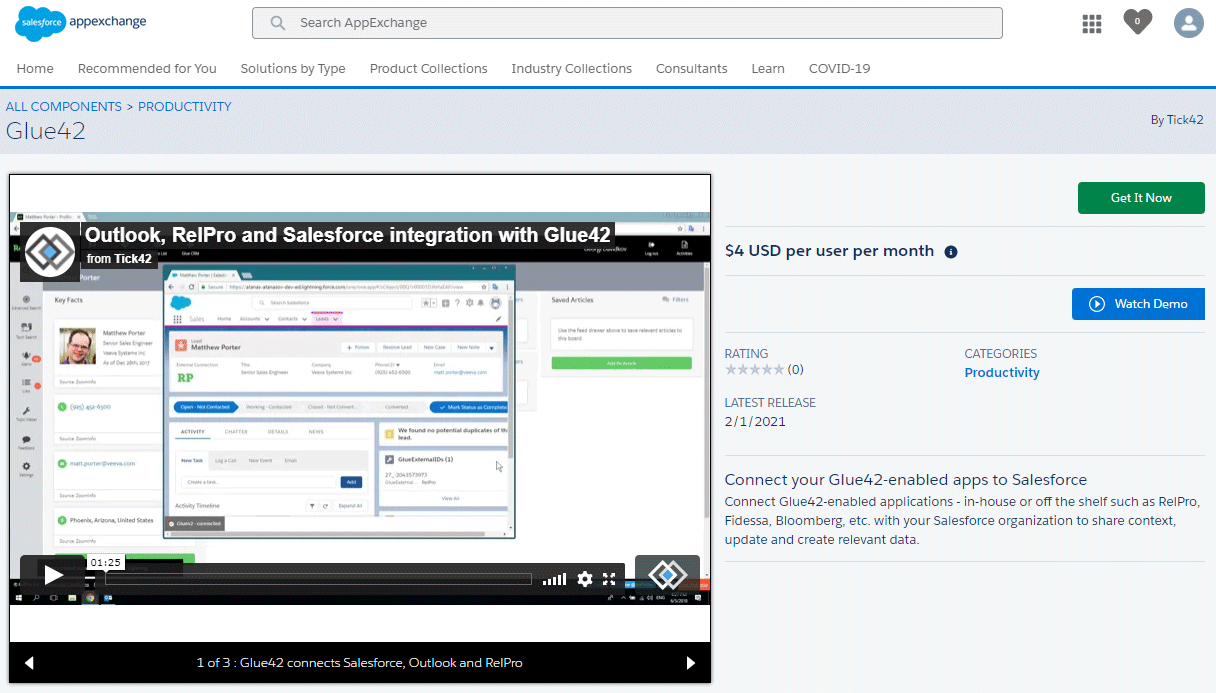
The Salesforce Connector is pre-packaged and uploaded as a Salesforce Component which you can install for your organization from the AppExchange Marketplace:
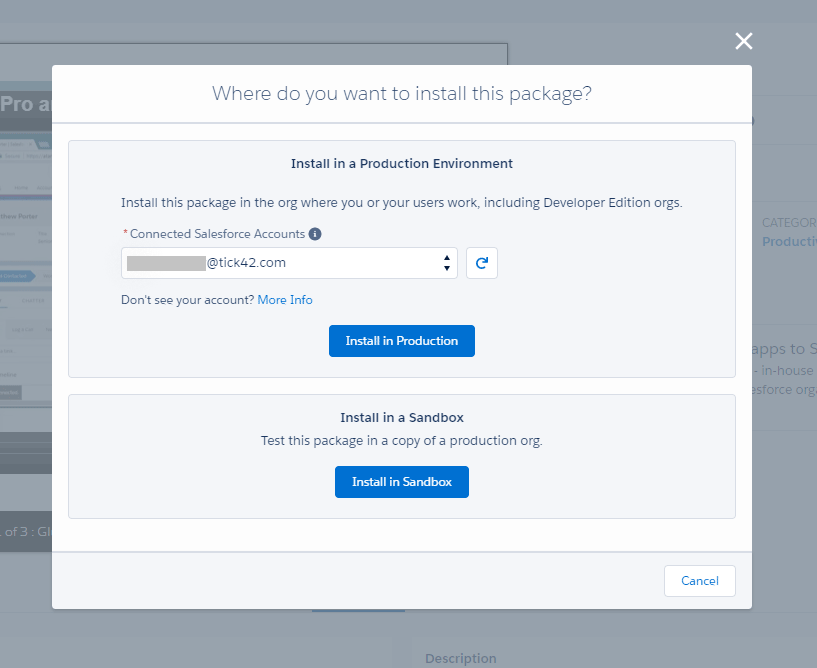
Click the "Get It Now" button and choose whether to install the Glue42 Salesforce Connector in production or in a sandbox:
Accept the terms and conditions and click the "Confirm and Install" button. Enter your Salesforce credentials to go to the installation page. Select for which users you want to install the Connector and click the "Install" button:
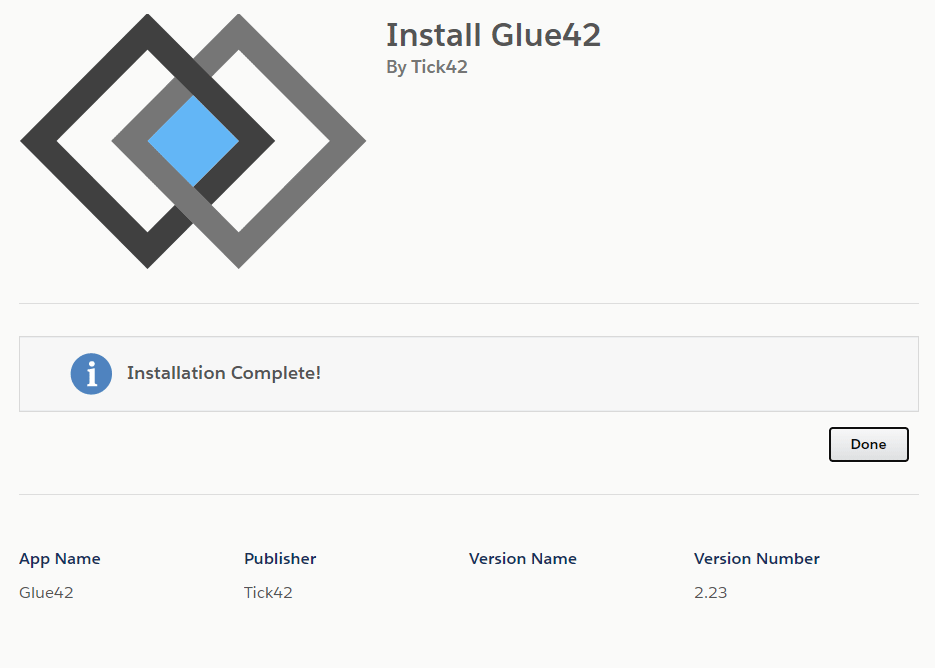
Wait for the installation to complete and press the "Done" button when the screen for successful installation appears:
Enabling the Connector
To enable the Salesforce Connector, you have to:
set up a custom domain name for your organization in order to be able to use the Salesforce Lightning Utility Bar and custom Salesforce Lightning Components;
attach the Salesforce Connector to the "Sales" Lightning app;
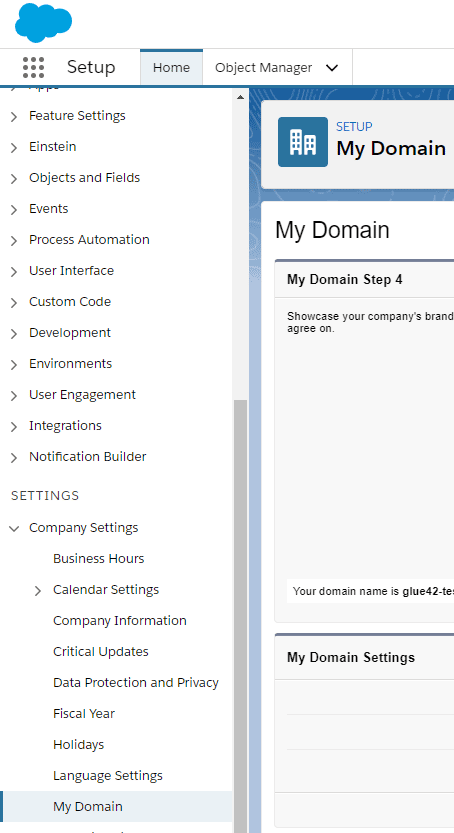
Custom Domain
If your organization domain name has already been set up, skip this step.
Go to Setup > Company Settings > My Domain and follow the steps for setting up a domain name for your organization. You have to choose and register an available domain name, login with your new domain name and deploy it to your users.
Attaching the Connector
Go to Setup > Apps > App Manager, find the "Sales" Lightning app and click the "Edit" button:

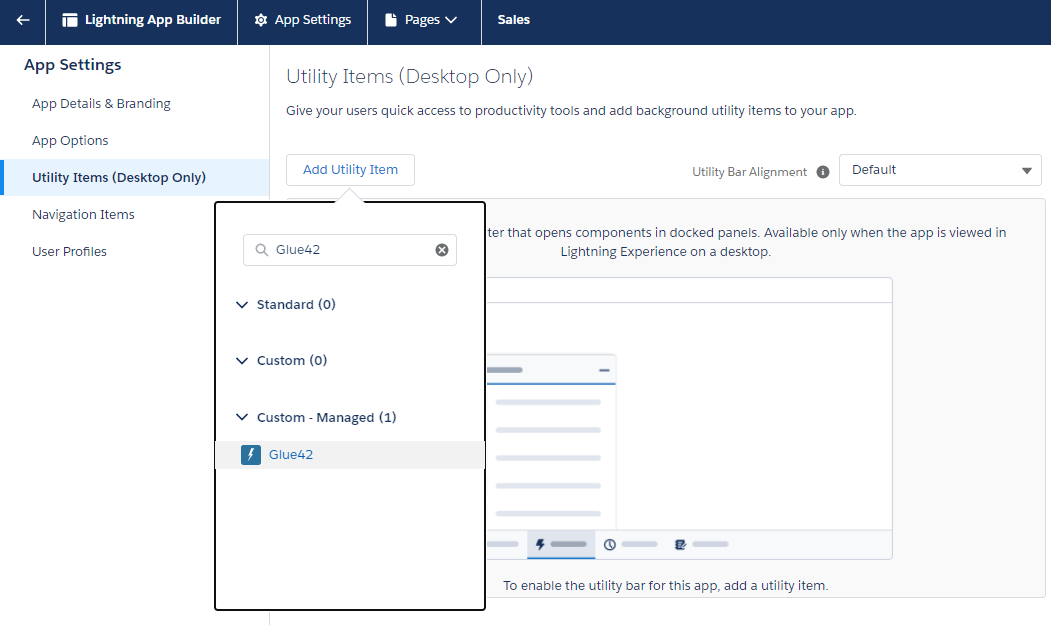
Go to App Settings > Utility Items and click the "Add Utility Item" button. Search for "Glue42" and click on the "Glue42" item from the item list:
It is recommended to use the default settings for the Connector. You can select the "Start automatically" checkbox to enable the Connector to load and establish a connection automatically before the user clicks on it to activate it, or after a page refresh:
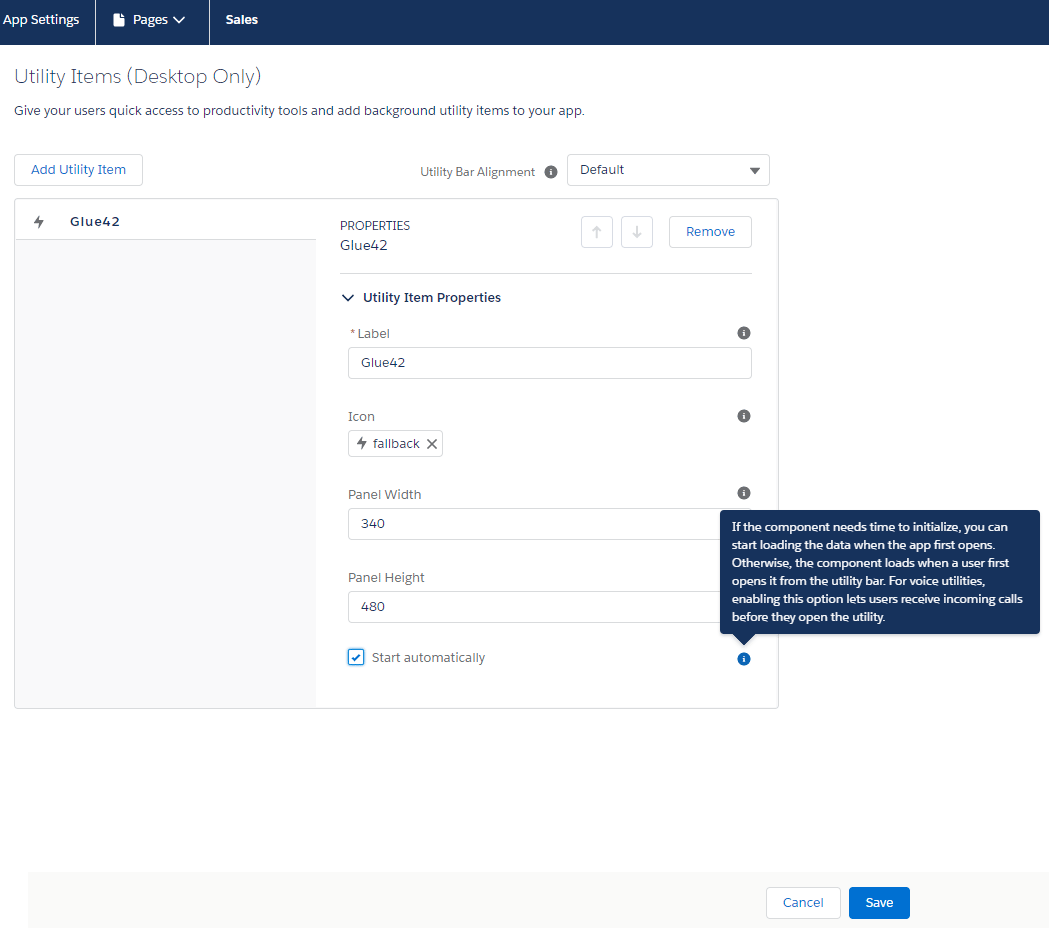
Click the "Save" button to save your changes.
Establishing a Connection
If you have done everything correctly, the Salesforce Connector should be available as a utility item in the utility bar of the "Sales" Lightning app:
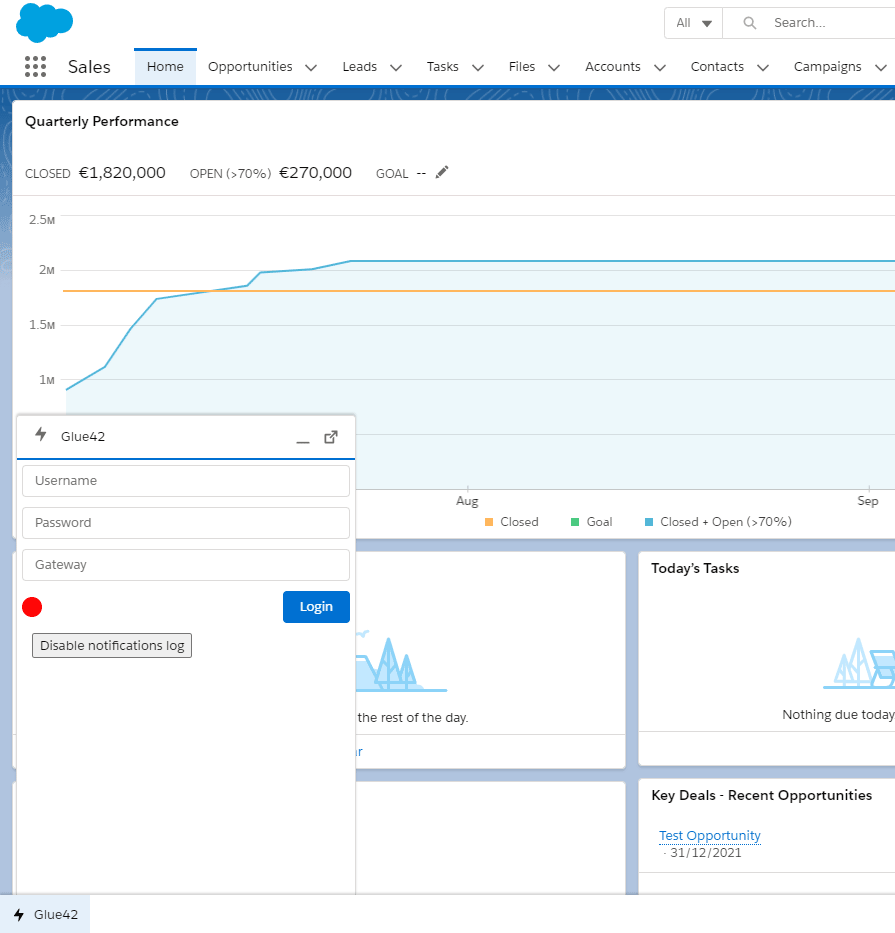
Enter a username, password and a Glue42 Gateway address to establish a connection. The default Gateway address is ws://localhost:8385.
Note that the username you supply to the Connector has to be the same as the one used by Glue42 Enterprise, otherwise the Connector won't be able to see the Interop methods your apps have registered in Glue42 Enterprise under a different username. By default, Glue42 Enterprise uses the Windows username of the currently logged in user which you can see by right-clicking on the Glue42 Enterprise tray icon or by running the echo %USERNAME% command in a command prompt.
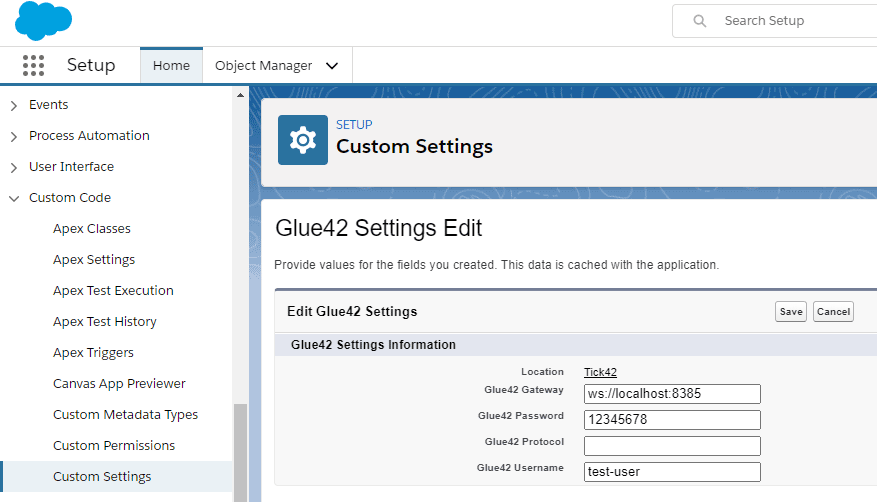
Default Credential Settings
You can configure default credentials which the Salesforce Connector will use to establish a connection when the page is reloaded or if the user clicks the "Login" button without entering a Glue42 Gateway address, username or password. Go to Setup > Custom Code > Custom Settings and click the "Manage" button of the "Glue42 Settings" list entry. Click "New". Enter a default Glue42 Gateway address, username and password:
Custom Metadata Types
Next, you have to edit the values for the "LightningURL" and "VisualURL" labels created for the Salesforce Connector. Go to Setup > Custom Code > Custom Metadata Types:
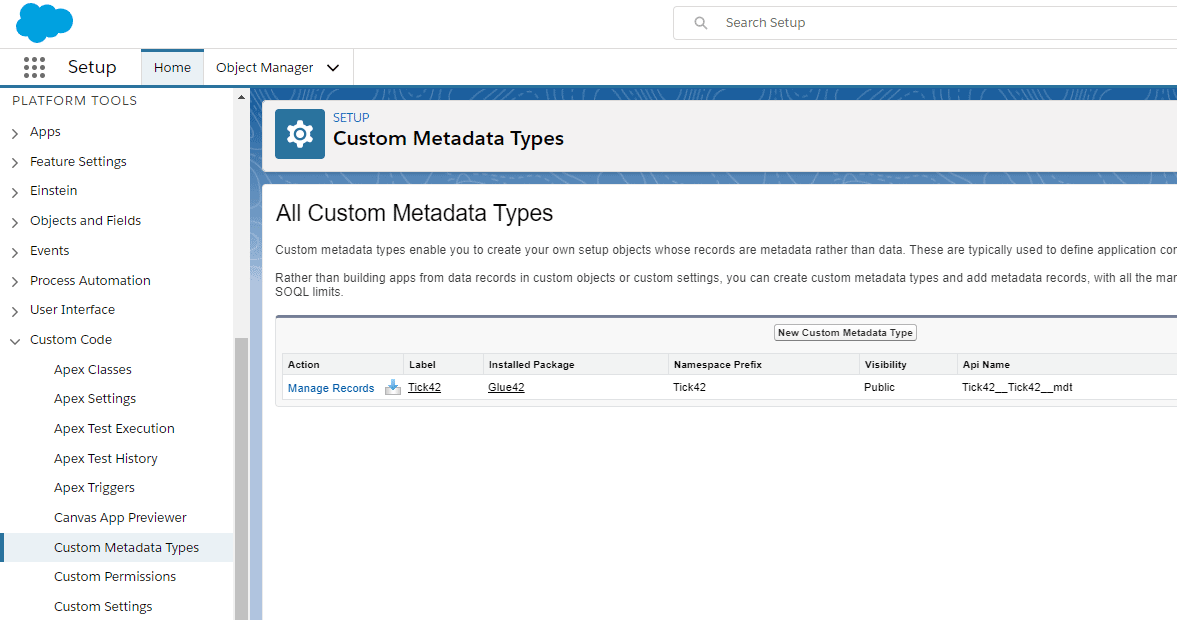
Click the "Manage Records" link next to the "Tick42" label and on the next screen click the "Edit" link next to the "Tick42" label.
Lightning URL
The value for the "LightningURL" field must be the same as the custom domain name for your organization, e.g. [organization-name].lightning.force.com:
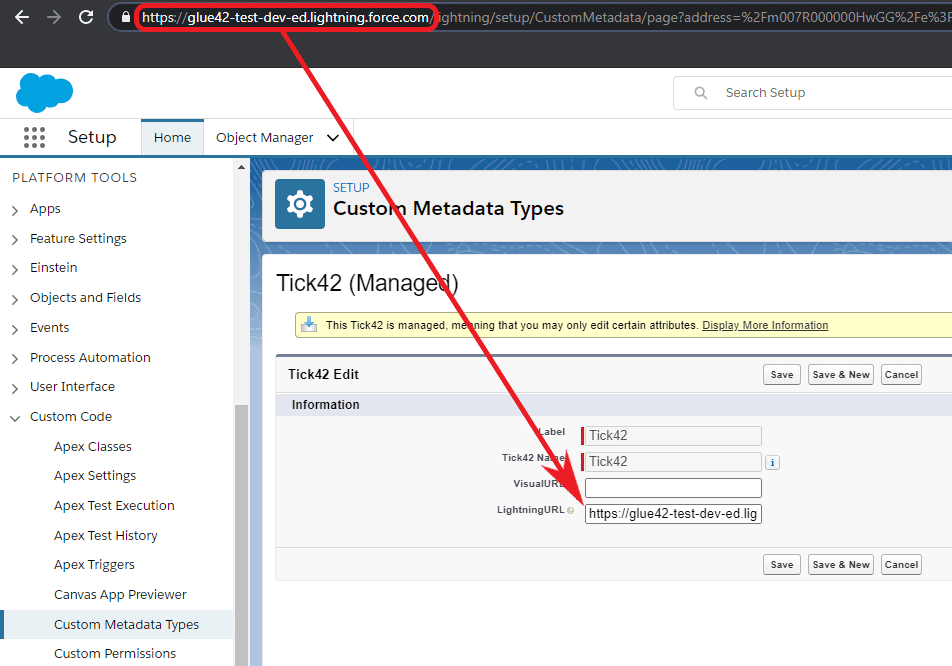
Click the "Save" button to save the changes.
Visual URL
To get the value for the "VisualURL" field, go to Setup > Custom Code > Visualforce Pages, click on the "Breakout" list item and click the "Preview" button on the next screen:
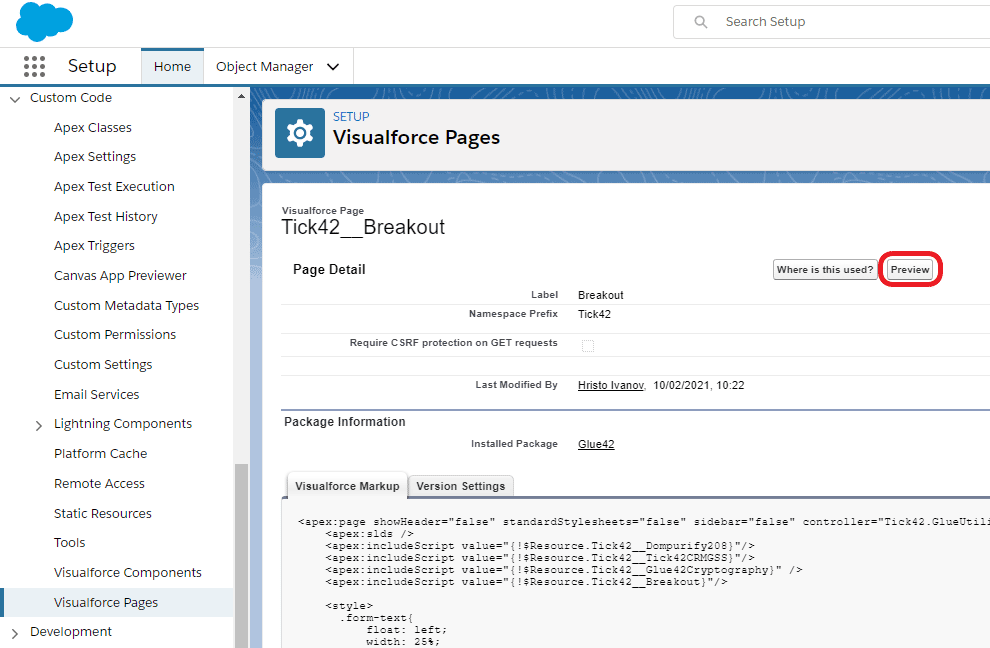
Copy only the domain part of the link from the address bar of the newly opened page:

Go back to the Custom Metadata Types section, set this address as a value for the "VisualURL" field and click the "Save" button.
Update & Uninstall
If you have installed the Salesforce Connector using the AppExchange Marketplace, it isn't necessary to uninstall it first in order to update to a newer version. If you want only to uninstall the Connector, follow the steps below.
If you have an older version of the Salesforce Connector which wasn't installed through the AppExchange Marketplace, you have to retrace the configuration and installation steps backwards in order to remove all package dependents first and then the package itself. For the example given in the Actions section this means:
- Remove the Action button from the
Contactpage layout.
Go to Object Manager > Contact > Page Layouts > Contact Layout and drag and drop the "Open Client Portfolio" button from the "Salesforce Mobile and Lightning Experience Actions" section back to the "Contact Layout" section and click the "Save" button.
- Remove the Action from the
Contactobject.
Go to Object Manager > Contact > Buttons, Links and Actions, find the "Open Client Portfolio" Action and click the "Delete" button.
- Remove the Salesforce Connector utility.
Go to Setup > Apps > App Manager, find the "Sales" Lightning app and click the "Edit" button. Go to App Settings > Utility Items and click the "Remove" button on the Glue42 utility.
- Delete the
OpenClientPortfolioComponent bundle from the resources in the Salesforce Developer Console.
Open the Salesforce Developer Console, go to File > Open Resource, search for the Component (OpenClientPortfolio.cmp) and open it. Go to File > Delete and confirm the deletion of the entire Component bundle.
- After all package dependents have been removed, go to
Setup > Apps > Packaging > Installed Packagesand click the "Uninstall" button of the Salesforce Connector package. Go to the bottom of the uninstall page, configure the uninstall settings and click the "Uninstall" button.
Note that if any dependents on the package exist, the uninstallation will fail. See the remaining dependents in the "Problems" section if the uninstallation fails and follow the links to remove them.